 Bob and Sue’s Home Maintenance Tips
Part 1: How to replace an HVAC air filter
By Bob and Sue Russo
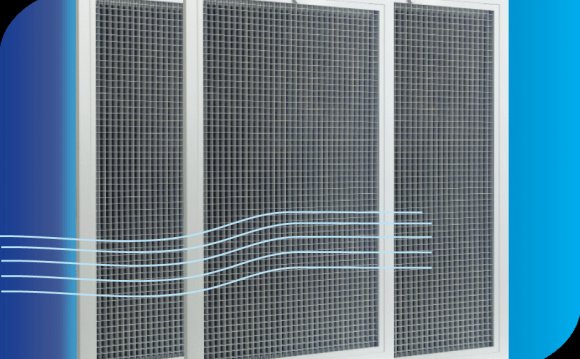
The “return air intake” in your home sucks the air from inside your home back into your HVAC unit, which keeps your house toasty in the winter and cool in the summer. If the air filter is clogged, your HVAC unit needs to work harder to keep you toasty or cool and your utility bill will take a hit. Note: You may also hear the term “return air intake” referred to as the “cold air return”. Old-time, northern transplants may use the second term, because they are more accustom to using furnaces. If you have a new home in North Carolina you have an HVAC system. This article with video will show you how to replace an HVAC air filter in just a few minutes.
We just heard a story tonight about a young couple that called their HVAC repairman because their house wasn’t staying a comfortable temperature, only to find out that they needed to change their air filter. They were charged $100 for this service. You can do this yourself for just a few bucks.
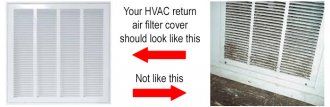
The return air intake has a filter that (according to most manufacturers) should be changed monthly but you can purchase filters that are rated to change once a month or every three months. The return air intake filter reduces dust particles in your home, so if you can write your name in the dust on your coffee table, you’re probably overdue. Another dead giveaway, is if your return air intake looks like the photo on the right below. YIKES!
You might want to put this job on your calendar just like you would a doctor or dentist appointment. We change ours about every three months because we buy three-month filters.
If you have a large or multi-level home, you most likely have more than one return air intake. The same information will apply to all of them.
(PLEASE NOTE In some older homes, the air filter is located directly in the HVAC Unit or furnace. Please refer to your owner’s manual for your HVAC Unit or furnace if you do not have a filtered return air intake as shown above.)
To change the filter, please follow the steps below.
- Locate your return air intake and open the door by releasing the clips usually located at the top of the frame.The disposable air filter rests just inside the frame.
- Make note of what size filter you have. Ours is 20 x 25 inches. You will need to do this for every return air intake in the house. They may not all be the same size. Leave the filter in place, close the door and latch…we’re ready to go shopping.
- Go shopping! You can buy air filters at Target, Walmart, Home Depot or Lowes etc. We like to buy several and have them on hand. We personally prefer to use the mid-priced filters, but you can buy washable filters for a little more money.
We just got back from shopping and realized how confusing this would be for first time home owners. Here’s the net of it. Any of these filters that are the right size, in our case 20 x 25 inches will work. The bottom shelf of this display shows the least expensive filters. These filters need to be changed on a monthly basis. The middle and top shelf filters are three-month filters. The only difference between the middle shelf filters and the top shelf filters is price and how much gunk they actually filter out of the air in your home. We have tried the higher priced filters, but in our experience they clogged up faster and seemed to diminish the air intake slightly. (We are not professional HVAC repair people, so if this point troubles you, you can always refer to your HVAC manual to see what they suggest.) There is one more option that we have never tried; washable filters. The mid-range filters that we buy cost about $4.00. The washable filters cost about $10.00. With the washable filters, instead of changing the filter, you remove them, separate the screening from the frame and hose the screening off until it runs clear and then reinsert the same filter. This idea sounds like it would be good for the environment, but we looked these up on several HVAC sites and they were not recommended. They indicated that your filter traps bacteria and fungus as well as dust. Rinsing these off does not remove the bacteria and fungus. If you really want to go green there were some suggestions to get around this, for example buy two sets of filters for every return air intake in your home and alternate the washed filter out every other change. Since we lack the experience with washable filters we would suggest that you follow the recommendations in your HVAC owner’s manual. If they tell you not to use them…don’t use them.
We should also note that most HVAC Manufacturers don’t recommend HEPA filters because of the dense filtration material used in HEPA filters. Your HVAC units may not be sized to handle the pressure dropped caused by a HEPA filter. The more your filter filters, the harder your HVAC system needs to work. This could cause wear on your HVAC unit and/or your house may not stay so toasty or cool. Your best bet is to go with the least expensive standard three-month filter.
- Okay now comes the easy part….Installation! Open the door on the cold air return and remove the old filter. Place the new filter in so that the arrows for “air flow” are pointed into the opening. Guide the filter back into the frame and close the door and latch. That’s it!
Share this Post
latest post
-
 Universal Condenser Fan Motor June 30, 2023
 -
 Root Cellar Temperature June 30, 2023
 -
 Residential Heating And Cooling Systems June 30, 2023
 -
 Damp Basement Floor Solution June 30, 2023
 -
 Furnace Return Air Ducts June 16, 2023
 -
 Return air Grille May 22, 2023
 -
 Damp Proofing membrane Manufacturers May 17, 2023
 -
 Crawl space ventilation formula May 12, 2023
 -
 Wood cold air return covers May 7, 2023