Flooding may be quick, but drying out a building is a time consuming effort. Allowing natural ventilation and evaporation to work is better for the building than the using heated forced-air or air conditioning systems. The rapid drying out of a historic building using hot air power drying systems can cause irreparable harm to significant features of the building.
Before starting to dry out your building, make certain to address health and safety concerns. Safety must come first; do not endanger yourself, your family, or other occupants. Assume all power lines are live. Do not trust the fact that power may be off all over the neighborhood; turn off the power to your house. Check for the odor of leaking LP or natural gas and turn off these services. Be aware that floodwaters may be contaminated with sewage or animal waste and present a health hazard. During clean up, protect eyes, mouth, and hands, and use disinfectants to wash hands before eating. If you are uncomfortable when entering your house and have any question regarding personal safety, do not go inside, but have a professional make an assessment.
Make a photographic record before you begin to clean up the damage. Documentation of the damages will be beneficial when negotiating with insurance adjusters.
Make temporary repairs to roofs and windows to prevent additional water from entering the building as you work to dry it out. Plan on temporary repairs lasting a minimum of six months. Temporary repair options include the use of tarpaulin, 30- or 90-pound felt paper, or plywood covered with tarpaper.
Water saturation affects a building in three ways:
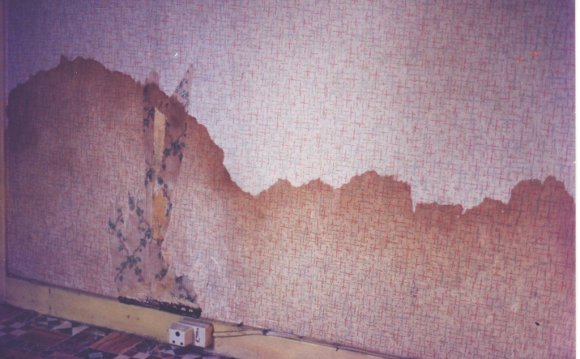
- Water causes direct damage to materials. Wallboard disintegrates; wood can swell, warp, or rot; electrical parts can short out, malfunction, and cause fires or shock.
- Mud, silt, and unknown contaminants in the water get everything dirty and are unhealthy. Floodwater is more damaging than rainwater.
- Dampness promotes the growth of moisture-related mold, mildew, and fungus that leads to dry rot.
Efforts to promote natural and controlled drying out of the building should start at the attic. If the insulation is wet, remove it and dispose of properly. After being wet, most insulation is ineffective, but it will continue to hold moisture for a long time and will create high moisture conditions which will damage metal, masonry, and wood.
Remove any water soaked items stored in the attic for treatment. The weight of water soaked boxes can cause cracking in the plaster ceilings of the floor below. Open windows and vents to allow fresh air to circulate. If your electrical system is safe and you have an attic fan, turn it on.
As you enter rooms, inspect ceilings carefully. Wet plaster and sheetrock are very heavy and can be a hazard. Be aware of bulging ceilings that may hold trapped water. If rainwater has collected in the ceiling, the rainwater will find it own route into the floors below. Collect water in buckets by poking holes at the edge of the bulging ceiling to release the water.
Plaster responds to drying out much better than sheetrock; however, durability depends on the plaster mix, the original application, the degree of water saturation, placement, and the type of lath used. Plaster over metal lath is likely to require replacement. Wood lath may expand if saturated, causing the plaster keys to break. Check for loose plaster and plan to reattach it using plaster washers. Plaster ceilings can be temporarily shored by using 2x4s nailed together to form a "T", then wedging the top of the "T" to press plywood against the ceiling.
Most plaster walls can be saved if damaged by clean rainwater. Drain water that may be held within the wall cavity by removing the baseboard and drilling holes through the plaster or sheetrock several inches above the floor. Use cordless or hand drills to avoid electrical shock and be careful to avoid wiring within the walls. Remove any insulation if wet via the baseboard removal and allow the wall cavity to dry out thoroughly.
Share this Post
latest post
-
 Universal Condenser Fan Motor June 30, 2023
 -
 Root Cellar Temperature June 30, 2023
 -
 Residential Heating And Cooling Systems June 30, 2023
 -
 Damp Basement Floor Solution June 30, 2023
 -
 Furnace Return Air Ducts June 16, 2023
 -
 Return air Grille May 22, 2023
 -
 Damp Proofing membrane Manufacturers May 17, 2023
 -
 Crawl space ventilation formula May 12, 2023
 -
 Wood cold air return covers May 7, 2023