Leaks in their basement floors are a common problem in homes. Whether the basement is finished or not, leaks in the floor can cause serious damage that can be costly if it is not repaired quickly after they are discovered. Not only can moisture from these leaks ruin carpets and wallboards, but it can also promote the growth of mold and fungus under the carpet and inside walls. Follow these steps to repair basement floor leaks:
Step 1 - Locating the Leak
Typically, a leak in your basement floor can come from a crack in the floor or the seam where your concrete floor and foundation meet. Before you can begin to repair the leak, you will need to locate the source of that leak. It will be less challenging to find it if you basement is unfinished.
A pool of water usually indicates the leak. Another indicator is a leaky foundation seam. If you have difficulty finding the leak, clean it up and watch the floor closely. You'll soon see the source of the water. If your basement is finished, you may need to pull up your carpet and pad in order to find the leak.
Step 2 - Preparing Your Surfaces
Certain types of sealers and patching compounds cannot be applied over painted surfaces. Check the product label to determine whether the basement floor or the wall that adjoins your floor is painted. Then read the labels of sealers and patching materials to learn if they can be used on painted surfaces.
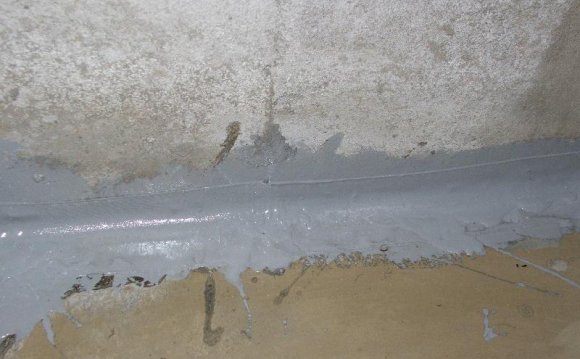
Step 3 - Repairing Floor Cracks and Joints
To repair basement floor cracks that are larger than .25-inches, clean the debris and dirt from the cracks before applying the concrete patch. Remove all loose concrete debris using a brush or air hose. For cracks where water exists, until the leak has stopped before applying the patch. For leaky floor-wall joints, remove dirt and debris from the joint before adding the sealant.
Step 4 - Applying Waterproofing
After the patching compound is applied settled, add the waterproof mix. If the crack or leaking wall-floor joint is still moist, you use a water soluble formula. Otherwise, the waterproofing will not adhere to the edges of the crack or leaky joint. Refer to manufacturer’s instructions to determine the compound to water ratio.
Step 5 - Applying Sealant
Brush the sealant onto the wall with a stiff bristle brush that allows you to get the sealer into any cracks or pores. Spread the sealant only on the repaired concrete. Do not apply it apply more than 2-inches from the leaking area. Allow the sealant to dry, then soak it with water. Let it harden overnight and add a second coat.
Share this Post
latest post
-
 Universal Condenser Fan Motor June 30, 2023
 -
 Root Cellar Temperature June 30, 2023
 -
 Residential Heating And Cooling Systems June 30, 2023
 -
 Damp Basement Floor Solution June 30, 2023
 -
 Furnace Return Air Ducts June 16, 2023
 -
 Return air Grille May 22, 2023
 -
 Damp Proofing membrane Manufacturers May 17, 2023
 -
 Crawl space ventilation formula May 12, 2023
 -
 Wood cold air return covers May 7, 2023