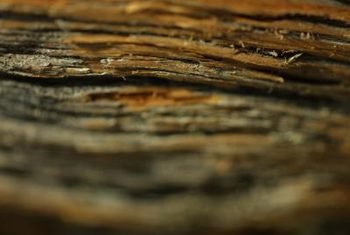
 Rot must be removed to prevent its spread to surrounding wood.
Wood rot inside walls is typically caused by water leaking in during severe weather or leaks in plumbing. It is essential that you first solve this problem before engaging in rot repairs. This will ensure that moisture does not continue to build up and damage the new repairs. Removing all rotted lumber and other materials is important, as dry rot will spread to surrounding wood and the rotted wood will attract insects and other pests, causing even greater damage.
Locating the Problem
Look for wet or soft spots along wall where there is suspected damage. Mildew or mold on the surface of the wall near the rotted area is another clue to rot. Investigate sagging, cracking and breakage in plaster and drywall as well.
Cut away drywall or plaster to expose the frame of the wall anywhere you suspect rot. This gives you a visual inspection area and improves circulation, drying the dampened area. Set up a fan to blow through the damaged area if excessive moisture is present.
Probe suspected rot with a fine pointed tool, such as an awl. Solid pieces may exhibit some signs of water damage without needing replacement. Replace any wood that the probe easily pierces into over 1/8-inch deep.
Resetting the Wall
Reset the position of the wall before removing or replacing any parts. Place a level against the face of the wall vertically to determine if the wall is plumb. If not, tip the top or bottom out to center the bubble in the level. Measure the distance between level and wall. A measurement of less than 1/2-inch in either direction is acceptable.
Support the overhead weight of the roof or floor above with a wooden beam, supported on posts fitted into screw jacks. Raise the jacks until the beams are snug, then raise just a bit more to take the weight off the wall.
Cut angled wood blocks at 22-1/2 degrees from 4-by-4-inch posts. Nail them to the floor about 4 feet from the wall. Set screw jacks on the angle cut blocks to move the wall in the desired direction until it is level. Leave all jacks in place.
Replacing the Rot
Remove the rotted boards completely wherever possible. Cut out the rotted sections from boards that cannot be removed. Smaller sections of the rotted wood can be cut out with a rotary tool and an attached saw blade accessory.
Cut boards of the same thickness and width as the boards you cut rot from. Make them long enough to span the cut section and extending onto good wood 12 inches above and below the cut. Nail it to the face of the damaged board.
Cut and install new boards of the same dimensions as the original boards you removed. Toe nail them in place, with framing nails angled through the top and bottom ends of the board.
Reinforce the wall at the top and bottom by installing aluminum hurricane brackets at the top and bottom of replaced or repaired pieces. This will help to keep the wall from shifting back into its old position.
Finishing the Wall
Release the jacks slowly, allowing the wall to settle into its new position gradually. Lower them at a pace of one turn per hour and watch for new cracks or other signs of stress in the surrounding walls and surfaces.
Replace the drywall or plaster over the repaired area. Float the seams around the repair with drywall patching compound. Sand and paint the repaired area to match the surrounding wall.
Watch the area closely for the next few weeks for signs of shifting or new water damage. Investigate and make repairs quickly should new damage occur to prevent undoing your original repairs.
Things You Will Need
- Fan
- Awl
- Level
- Screw jacks
- Posts
- Angle cut blocks
- Hammer
- Pry bar
- Rotary tool with saw blade accessory
- New lumber
- Nails
- Screws
- Hurricane tie brackets
- Drywall
- Drywall patching compound
- Drywall float trowel
- "Complete Remodeling"; This Old House Books; 2004
- "This Old House"; Bob Vila; 1980


