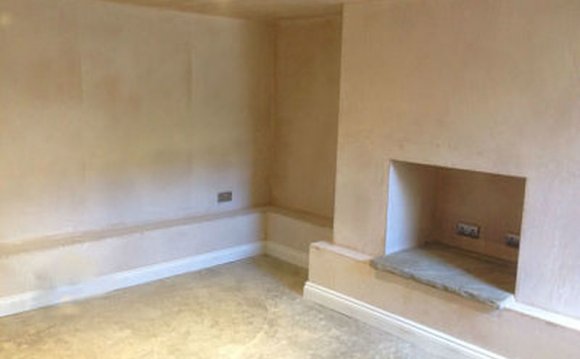
These days, however, most homeowners expect basements to stay dry. During the 1930s and 1940s, as basements gradually replaced cellars, construction specifications for residential foundations improved. Poured concrete walls replaced stone walls; concrete slabs replaced dirt floors. Some builders even included footing drains.
But the results of these efforts were uneven. Millions of Americans are still living in homes with damp basements.
New construction tips
This article will focus on ways to fix a damp basement so that it’s dry enough to use as indoor living space. Before tackling that topic, though, I’ll briefly outline the steps used during a new construction project to keep the basement dry.
Remember: fixing a wet basement can cost tens of thousands of dollars. It will never be easier to get the details right than when a home is first built; spending a few hundred extra dollars now can save thousands later.
If you are building a new home, and you want a dry basement, you should specify:
- Wide roof overhangs to keep rain away from the foundation;
- Gutters at the roof eaves; these gutters should be connected to conductor pipes that convey the roof water far from the house (either to daylight or a dry wellUnderground structure that captures, then slowly releases storm-water runoff so that it can be absorbed by the soil.);
- A 4-inch-thick layer of crushed stone under the basement slab as a capillaryForces that lift water or pull it through porous materials, such as concrete. The tendency of a material to wick water due to the surface tension of the water molecules. break; the crushed stone layer needs to be vented through the roof to help control radonColorless, odorless, short-lived radioactive gas that can seep into homes and result in lung cancer risk. Radon and its decay products emit cancer-causing alpha, beta, and gamma particles.;
- A layer of horizontal rigid foam on top of the crushed stone to insulate the slab from the cold soil below;
- A layer of polyethylene above the rigid foam (directly under the concrete slab) to act as a vapor barrier;
- At least one 4-inch-diameter drain pipe running through the footing, to connect the crushed stone layer under your basement slab with the exterior footing drain;
- A capillary break (for example, an asphaltic dampproofing compound, UGL DryLok, or elastomeric paint) between the top of the concrete footing and the foundation wall;
- A ring of perforated drain pipe on the outside of the footing, surrounded by crushed stone and wrapped with filter fabric to make a “burrito, ” drained to daylight, to a distant drywell, or to an interior sump;
- An application of dampproofing compound or waterproofing compound on the exterior side of the concrete foundation walls;
- A layer of dimple-mat drainage board installed on the exterior side of the foundation walls; failing that, the foundation should be backfilled with coarse, free-draining material like crushed stone, topped with an 8-inch layer of dirt (ideally, dirt with a high clay content);
- A bead of sealant to seal the crack between the basement slab and the basement walls;
- Closed-cell foam sill seal between the top of the foundation walls and the mudsill, to reduce air leakage and to act as a capillary break.
Unless you are planning to have a basement bedroom, it’s best to eliminate basement windows, since windows can provide paths for water leaks.
That wet basement smell
If your basement is damp, it's probably because some of the measures advised for new construction are missing. For example, many older homes have no footing drain or polyethylene under the slab.
How do you know that your basement is damp? There are lots of signs. For example, when you put a cardboard box on the floor, the cardboard disintegrates. Maybe you noticed that mold is growing under a carpet. Maybe the walls feel damp.
Another clue is the distinctive odor of mold.
Mold is associated with high humidity. The humidity in your basement may be coming from the soil — water can leak through cracks in a concrete wall, or moisture may be constantly evaporating form the interior side of the vapor-permeable and always-damp concrete — or the humidity may be condensing from the air inside your home.
During the winter, condensation occurs near the top of the basement walls, since those areas are coldest. During the summer, on the other hand, the coldest concrete surfaces are the slab and the lower sections of the foundation walls — so that’s where the condensation happens.
There are two reasons you might want to install a continuous layer of rigid foam insulation under a basement slab. First of all, the insulation slows heat loss during the winter. More importantly, perhaps, the insulation warms up the slab during the summer, reducing the chance of condensation. That means that your basement won’t smell moldy, and your slab will be warm enough to allow you to install carpeting. (If you install carpeting on an uninsulated slab, there is a high likelihood that you have established conditions for a mold farm.)
First things first
So, you know that your basement is damp, and you want to fix it. What’s the first thing to do?
Many homeowners guess — wrongly — that the first step is to install a dehumidifier. Actually, installing a dehumidifier is an action of last resort. After all, installing a dehumidifier condemns you to a lifetime of high energy bills.
Cover dirt floors with polyethylene. Although this step may be obvious, it still belongs at the top of the list. If a portion of your basement has a dirt floor, the first step is to cover the dirt with a layer of polyethylene that is at least 6 mils thick. If your budget is tight, weigh down the polyethylene with stones or a few bricks. If your budget can handle the expense, pour a concrete slab over the polyethylene.


