 I have bruises on my knees.
If it weren’t so far away, I’d have kneepads on my Christmas wishlist at this point. But no matter, the hard part (if you can even call it that, it was actually pretty easy!) is done. Follow me on my epically long thought process to explain why I’m beginning this project now:
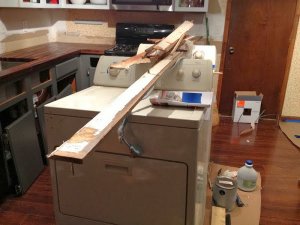
I’m still in the middle of my kitchen renovation, but my parents have offered to supply me with a new washer and dryer as a graduation present. They’ve given me a budget of less than $1, 000 for the set, and I can’t help but think I can get even more bang (hehe) for the buck if we make our purchase on Black Friday. And since that’s less than two weeks away, and I have no flooring in there thanks to Charlie’s puppy phase (gnawing on the baseboards too), and I hate the idea of moving the new appliances back out on my own just to tile the floor…
I’m doing it now, so I don’t have to later. Project justified. Maybe.
But that’s what brings us to this bright orange stuff. It’s called Ditra, and it’s specially designed to handle a number of challenges that come with tile flooring. It came highly recommended, and the reviews I’ve read for this stuff couldn’t sing its praises enough. I don’t think I quite fully understand how it works, but after a minute or two, it starts to make sense. When the seasons change, subfloors are impacted by temperature, vapors, movement, and moisture. Tiny amounts of movement can cause issues for anything glued to it, like tile. Too much stress on the tile (either from movement or an uneven balance of pressure), and before you know it, your beautiful tile job is a cracked, haggard mess.
 Ditra is essentially a molded plastic sheet with fleece backing. Its primary function is to help neutralize stresses in movement between the substrate (in my case, the subfloor, but it can also work with OSB or plywood) and the tile. The fact that the tile isn’t bonded directly to the floor (aka uncoupled) keeps the movement of what’s underneath from cracking the tile stuck on top.
It’s not exactly cheap (and this isn’t a sponsored post), but installation is pretty easy (cost me $80 for a 54 sq ft roll, and I had to cover 45 sq ft). You just need a utility knife to cut things to size.
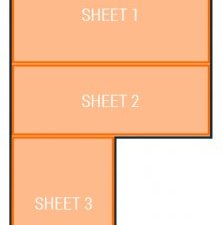
Dad came over to help install, and we came up with a game plan to make it as easy as possible. My laundry room is an odd shape, with one large square for the washer and dryer followed by a narrow hallway in front of the door. We chose to cut three pieces, two fitting horizontally in the square, and one perpendicular for the hallway. Doing this prevented me from having to spend extra time cutting a perfect notch in the Ditra to fit the corner (the image below shows ya what I mean).
 To adhere the Ditra to the floor, you just need to mix a little tile mortar to the right consistency (like a thick milkshake – fluid, but able to hold shape). The rain wasn’t exactly a helping hand during this project, but it did help to make sure none of the excess powder mortar stuck to my front porch slab.
Note: it’s very important to use the right mortar for the job; it can’t be mixed with polymers and absolutely no premixed. I had to ask the sales clerk at the store to help me find the right bag, but I was able to get all my materials in one big box store, so I was happy not to spend hours tracking down supplies.
Spread tile mortar in sections, notch it with a trowel (size 1/4″ x 3/16″, using a 45-degree angle), and lay the Ditra on top, fleece side down. (FYI: I’m wearing a mask and gloves as protection from the powder mortar. Not only do I not want to be breathing the stuff in as a fine powder, but when mixed with water, mortar is corrosive on the skin. Doing these projects so often now, I have learned to take better precautions.)
Use a grout float to put pressure on top, smoothing out any air bubbles to the corners. It ain’t easy on the knees, but it took a couple of hours to mix, spread, flatten, and do it all over again for the next piece. The room was too small for both of us to work in there together, so Dad mixed the rest of the mortar while I did the installation. The hardest part was around the door, since I wasn’t smart enough to think about removing the door before we tried to install the last piece, and the door swings into the room.
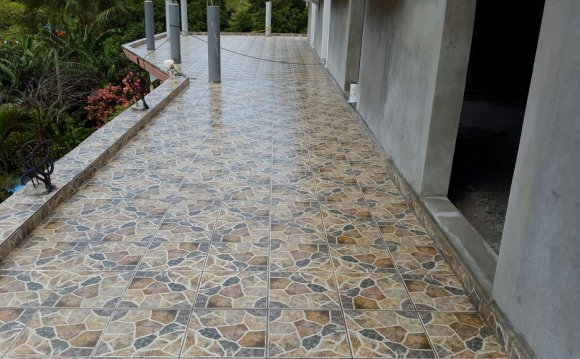
But eventually, the entire room had a waffley orange coating. The best part about using Ditra is that you don’t have to wait for it to cure before tiling, but Dad and I were already wiped and chose to tackle that part another day. Instead, I just used a box of the tile to start dry fitting.


Share this Post
latest post
-
 Universal Condenser Fan Motor June 30, 2023
 -
 Root Cellar Temperature June 30, 2023
 -
 Residential Heating And Cooling Systems June 30, 2023
 -
 Damp Basement Floor Solution June 30, 2023
 -
 Furnace Return Air Ducts June 16, 2023
 -
 Return air Grille May 22, 2023
 -
 Damp Proofing membrane Manufacturers May 17, 2023
 -
 Crawl space ventilation formula May 12, 2023
 -
 Wood cold air return covers May 7, 2023